Showing posts with label Mixed Media. Show all posts

Tuesday, September 1, 2020

Autumn Is Calling Gecko Galz Sept 2020

 Welcome Back Friends,

Robin here with Gecko Galz Blog sharing a couple of fun projects centered around Autumn. Autumn is my favorite time of year! I love the cooler days, the colors that autumn bring, the crunch of the leaves beneath my feet, the smell of cinnamon, and the fact that my favorite holiday is in there too! 

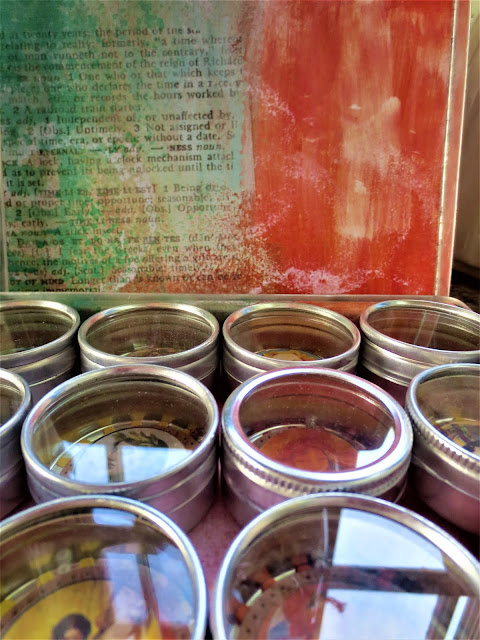
My first share involves upcycling a bead tin into a one of kind piece! 


For this project I used the Artist Circles Jewel It Collection and various size circles, cogs and gears. A mix if different small beads, and the containers that came with the box. I love how it all came together!


My next project I want to share is so my style!!   I love little books and little books with ink edges make my heart sing! I used the Autumn Splendor Collage Set and the page 3 from the Autumn Calling Paper Pack. 


Thank You for visiting and as always I appreciate your kind comments.

Until Next Time....

Robin 

Wednesday, April 22, 2020

Fly Free Altered Mix Media Paintbrush. GG April 2020


Welcome Back Friends,

 Robin here sharing a project for Gecko Galz Blog,  Spring has sprung! I love hearing the birds early spring after a long quiet winter. I am a early riser and out the door most days early morning, it warms my heart to hear their beautiful song.


I feel in love with the Collage Sheet Fly Free, and was excited to work with such beautiful images!

Here is what you need:
Paintbrush
Paint
Sponge Brush
Lace
Small roses
Flat back pearls
Walnut Ink Stain
Leaf Die Cut
Berry Die Cut
Heat Tool
Hot Glue Gun
Fly Free Collage Sheet

Here is what I did"

I painted the paint brush here and and the bristles top and bottom. I carefully fried it with my heat tool. I hit the bottom of the bristles to not only dry, nut to give it a used look, as the bristles will melt and shrink a bit. I scratched paint off here and there to lend to the used loo.

I die cut leaves, berry twigs and fussy cut the images out I chose to use.

I rounded the corners and distressed the edges on the images.\

Assembly came next using a hot glue gun, add the lace, the die cut leaves and berry twigs, roses and flat back pearls. Viola! Done

Thank You for visiting and as always I appreciate your kind comments.

Until Next Time,

Robin


Friday, March 27, 2020

Fresh and Springy Tulips Altered Paint Brush


Welcome Back Friends,

Robin here with The Coffee Beans sharing a fresh and springy altered paintbrush. I used the beautiful Tulips digi stamp from our own Annie Collins which can be found on the Facebook Page The Multi Crafters Craft Cafe, go to photos, click albums, look for The Coffee Bean Stamp Machine, scroll till see the tulip set.


Supplies: Paintbrush, old and painty or a new one that can be painted up.
                Paint of your choice
                Foam brush
                Lace, ephemera, embellishments, digi image, ribbon
                Hot glue gun

What I did: I painted my new brush, here and there. I painted the bristle of the brush to match, just the top layer and then along the bottom of the bristles.

Using a heat gun, I dried the brush top and sides. I then carefully hit the bristles with heat which then caused the bristle to melt and shrink a bit, making it looked like it had been used.

Then taking care I scrap paint off  here and then further adding to the used look.

I then colored my tulips using an eye make up applicator and distress oxide ink, starting at the bottom and blending up.

Using the glue gun I adhered the lace, arranged the tulips gluing down, added the ephemera, the ribbon for the hanger and there you have it!

Thank You for visiting and as always I appreciate your kind comments.

Until Next Time......

Robin


Wednesday, March 18, 2020

Shabby Chic Breath Card ADTSM March2020


Welcome Back Friends,

Robin here with Addicted Stamps and More Challenge Blog, sharing my project for March, or theme this time is Any Thing Goes. Check out my card for this challenge!


Get crafty and join us over on the challenge blog!

Thank You for visiting and as always I appreciate your kind comments.

Until Next Time....

Robin

Thursday, February 27, 2020

Snow Maiden Vintage Clip Board


Welcome Back Friends,

I am excited to share  my Feature Day project with you for the Gecko Galz Blog. I am smitten with the beautiful images from Gecko Galz Etsy Store, I am like a kid in a candy store!


The beautiful image I used here on my vintage clip board is from the collage set Snow Maidens .
Isn't she beautiful???

I began my project by covering the clip board with patterned kraft paper. I then used a snow flake stencil with white gesso and stenciled on snow flakes. I trimmed my image, inked the edges, and inked the edges of the clip board. I adhered the image to the clip board, added the pearl on the clip. I then inked the edges of the chip board flourishes, and inked up the kraft snow flakes, and adhered them in place. I added a few gold flat back pearls and a sheer white bow with a few pearl headed straight pins, bringing the piece  together.

Thank You for visiting and as always I appreciate your kind comments.

Robin


Friday, September 27, 2019

Coffee Lovers Mixed Media Wall Hanger- Cutting Cafes Digi Stamp for the Coffee Beans Challenge Blog


September 27 2019

Welcome Back Friends,

Robin here creating for The Coffee Beans Challenge Blog, a brand new challenge blog! Please consider joining us on the blog for some fun, and show off your creations.

Thank You to our sponsor this month, the Cutting Cafe, for the use of The Coffee Word Shaped Card, Tune back in to see what we have created using another Cutting Cafe digi file, which I will keep a secret for now!

I have been a coffee drinker since 1975, I know the date of when my love affair began with coffee, because I was fresh out of high school with a cosmetology license. Armed with my licensed and excitement to follow my dreams in the beauty industry, I began hunting for my first position as a stylist in a salon. I landed that position on my first interview and so it began! Long days, starting early and ending late, gaining experience that could not be taught in school, I throw myself in the role as the new stylist. I swept up a lot of hair, did thousands of shampoos, rinsed perms, emptied trash, all of what was not my clients or my mess. You see, that is how you built a client base, by getting to know every client of the salon. Everyone I worked with drank coffee by the gallons and smoked. I never picked up the smoking habit, however, I sure did begin my long time love affair with coffee. I still today start everyday with a cup of coffee, and enjoy every last drop!

I started my project by recycling a very heavy piece of card board, that was part of the packing from the magnet register covers I buy at a local big box store, that I used to store my die cuts on. I try to recycle what I can in my projects, recycle, reduce, reuse.

I began by brushing on 3 different colors of acrylic paint to the cardboard, adding the darkest first and working towards the lightest last. After that was dry, I used a stencil with dots and added gold acrylic paint, by adding a bit of water to a puddle of paint, picking up the paint with a almost dry wipe and swirling it over the stencil. While that was drying, I fussy cut the word coffee, and added color to the word using distress inks and a sponge applicator. I inked all edges and set aside to dry. I created a coffee ring on the right side, and decided then to use a roughly ground instant coffee, mixed with a clear gel glue, for added interest, making sure I created some drips, and left some grounds for texture. I then added yet one more layer of texture by splattering the darkest color of the colors of latex paint over the project. After all was dry. I inked the edges of the card board, using walnut ink, and added punched photo corners. I finished of the project by punching small holes and stringing some good old fashion cotton string, for the hanger.


Are you a morning coffee drinker or all-day coffee drinker??

Thank You for visiting and as always I appreciate your kind comments.

Until Next Time.........

Robin

Wednesday, July 31, 2019

Happy Craft Challenge Blog Off The Page -Vintage August 1 2019


Welcome Back Friends,

This is my first post since joining Happy Craft Challenge Blog which can be found here:
/Happy Craft Challenge Blog   Check out the blog for wonderful inspiration and consider entering our challenges!

I am on Team C, the "off the page" design team! So exciting! This months theme is Vintage. I chose to work a fabulous unicorn from Fabrika Fantasy, be sure to stop by their store and check out their wonderful digis!  Fabrika Fantasy

I love to recycle found items, I found in my stash a Christmas canvas that had the prettiest sage green background, I grabbed that and went to work.


I first began by making my background paper, which I used as my mat. I started with 12 x 12 piece of kraft stock. I then picked out 4 colors from my acrylic paint stash. I wanted a bit of gold, to tie in the mane of the unicorn. The other colors were a umber, a tan, and then finally a latte color. I brushed on the colors starting with the darkest and working through the tan and the ended with the latte. After that dried I watered down the gold a bit with water and used a doily stamp, to pick up the paint and stamped my back ground here and there. Set aside to dry.

I fussy cut the unicorn out and used a sponge blender with Tim Holtzs Antique Linen Distress ink and colored in the unicorn. I then inked the edges with Walnut Stain from Tim Holtzs Distress Ink line. Set aside to dry.

I next cut my mat from my background paper and adhered it to the canvas, making sure to cover up the Christmas design. As my glue was drying, I die cut flowers using Tim Holtz Tattered flowers die, from kraft, sage green and a scrap of my background paper. I ink the edges of the flowers and leaves with walnut ink.

Now for the fun part! I began by adhering my unicorn, centered in the mat. I then put my flowers together and laid them out how I wanted then. I then glues then down, I punched out photo corners, inked the edges and adhered them to the 4 corners.  I punched out a few swirls and worked them into my flowers for a little more flair., and finished the flowers off with brown flat backed pearls for the centers.

I hope I have inspired you to recycle a canvas you may have into a one of a kind piece of art!

Thank You for visiting and as always I appreciate your kind comments.

Until next time.............

Robin

Thursday, May 9, 2019

Scrapping4fun Challenge Blog Tea Box May 10 2019


May 10 2019

Welcome back friends

This is my first project and post for Scrapping4funBlog!! https://scrapping4funchallenges.blogspot.com/. The theme for this challenge is Coffee-Tea. I drink both, coffee is my morning go to and tea is my afternoon or bed time wind down go to. I enjoy tea in  tea bags, I have some favorites in bags,  and also loose leaf tea, I enjoy both. I had just received a bag of loose leaf tea as a gift and decided on a tea box! As I was creating this tea box, I took a walk down memory lane, Every Sunday morning, I would walk to church, pass the building where my maternal grandmother lived. After church I would always stop in to see my Grandmother, where she would be just putting the kettle on and setting the table for our Sunday get together ! I would eat slices of Hollywood brown bread with butter, yes real butter and peanut butter on top with a cup of Salada tea with two sugar cubes. We would visit and talk like we were not going to see each other again for a long time, funny thing, I would be seeing her on Monday!! My grandmother and her mother, my great grandmother spent every day of the week with us at our house! I look back on the time spent with them with love and thankfulness. They shaped me into the woman I am today. I miss them both dearly.


Here is what I did, I happen to have the doily like wood cut in my stash, which I painted white. The blue plate like piece come from Bo Bunny. I stamped the cup, spoon, and tea bag. Using Tim Holtz Distress Ink in Faded Jeans, I brushed the edges.  Put it all together for a one of kind gift for yourself or a tea loving friend.


I hope I was able to provide some inspiration for you! Thank you for visiting and your support.

Until next time........
Robin

Friday, April 26, 2019

Jo's Scrap Shack FCC # 279 Team B LBBS Tasty Cup Cake 4/26/2019

April 26 2019

Welcome Back Friends,

I love to celebrate birthdays! Mine, of course, LOL, and family and friends. When I received my Little Blue Button Stamp to work with I knew I wanted to create a masculine gift box, that later could be used as a stash box.

I pulled a wooden cigar box from my stash that has a suede top and black graphics. I began by coloring my cupcake with Tim Holtz's Distress Oxide Ink in colors Old Paper and Walnut Stain. I fussy cut the cup cake taking care to cut a part the frosting as I wanted to pop dot it for added dimension.  I die cut cogs and gears from Tim Holtz, and embossed then using, Seth Apter's Baked Texture, in Vintage Bees Wax, and bronze. I die cut Happy Birthday and embossed with Ultra Thick Black embossing powder.


I pulled out a few steampunk metallic buttons I had in my stash and added some here and there to tie in the metal corners on the box.


I finished the inside with pattern paper, and birthday sentiment and a stamped top hat, to tie in the steampunk vibe.


I hope you enjoyed my project for Jo's Scrap Shack FunDay Friday Challenge Blog.

Thank You for visiting and I appreciate your continued support and kind comments

Until next time...........

Robin

Conjure of Dreams Santa on Vacation!

 Merry Christmas, and Yule Blessings, Have you ever wondered were Santa would vacation? I have! Here is where I think Santa and the Mrs. wou...