Sunday, June 30, 2019

A Perfect Time To Craft Challenge Blog: Charlies Stamps July 1 2019


July 1 2019


Welcome Back Friends,

I am so excited to announce that I am now a member of  A Perfect Time To Craft Challenge Blog!

This is my first post with A Perfect Time To Craft Challenge Blog as a design team member !!          https://aperfecttimetocraft.blogspot.com/

Be sure to click on the link to the challenge blog, it is filled with fabulous inspiration and be sure to enter a challenge or two for a chance to win some great prizes!

I enjoyed my wonderful chance to work with a digi stamp from Charlie's Stamps, which can be found here:
Charlie's Stamps Etsy Store:
https://www.etsy.com/no-en/shop/CharliesStamps?ref=s2-header-shopname


https://www.etsy.com/listing/623756208/cute-digistamp-dragon-cute-digistamp?ref=shop_home_active_26  is the link for the stamp I used, Cute Dragon.


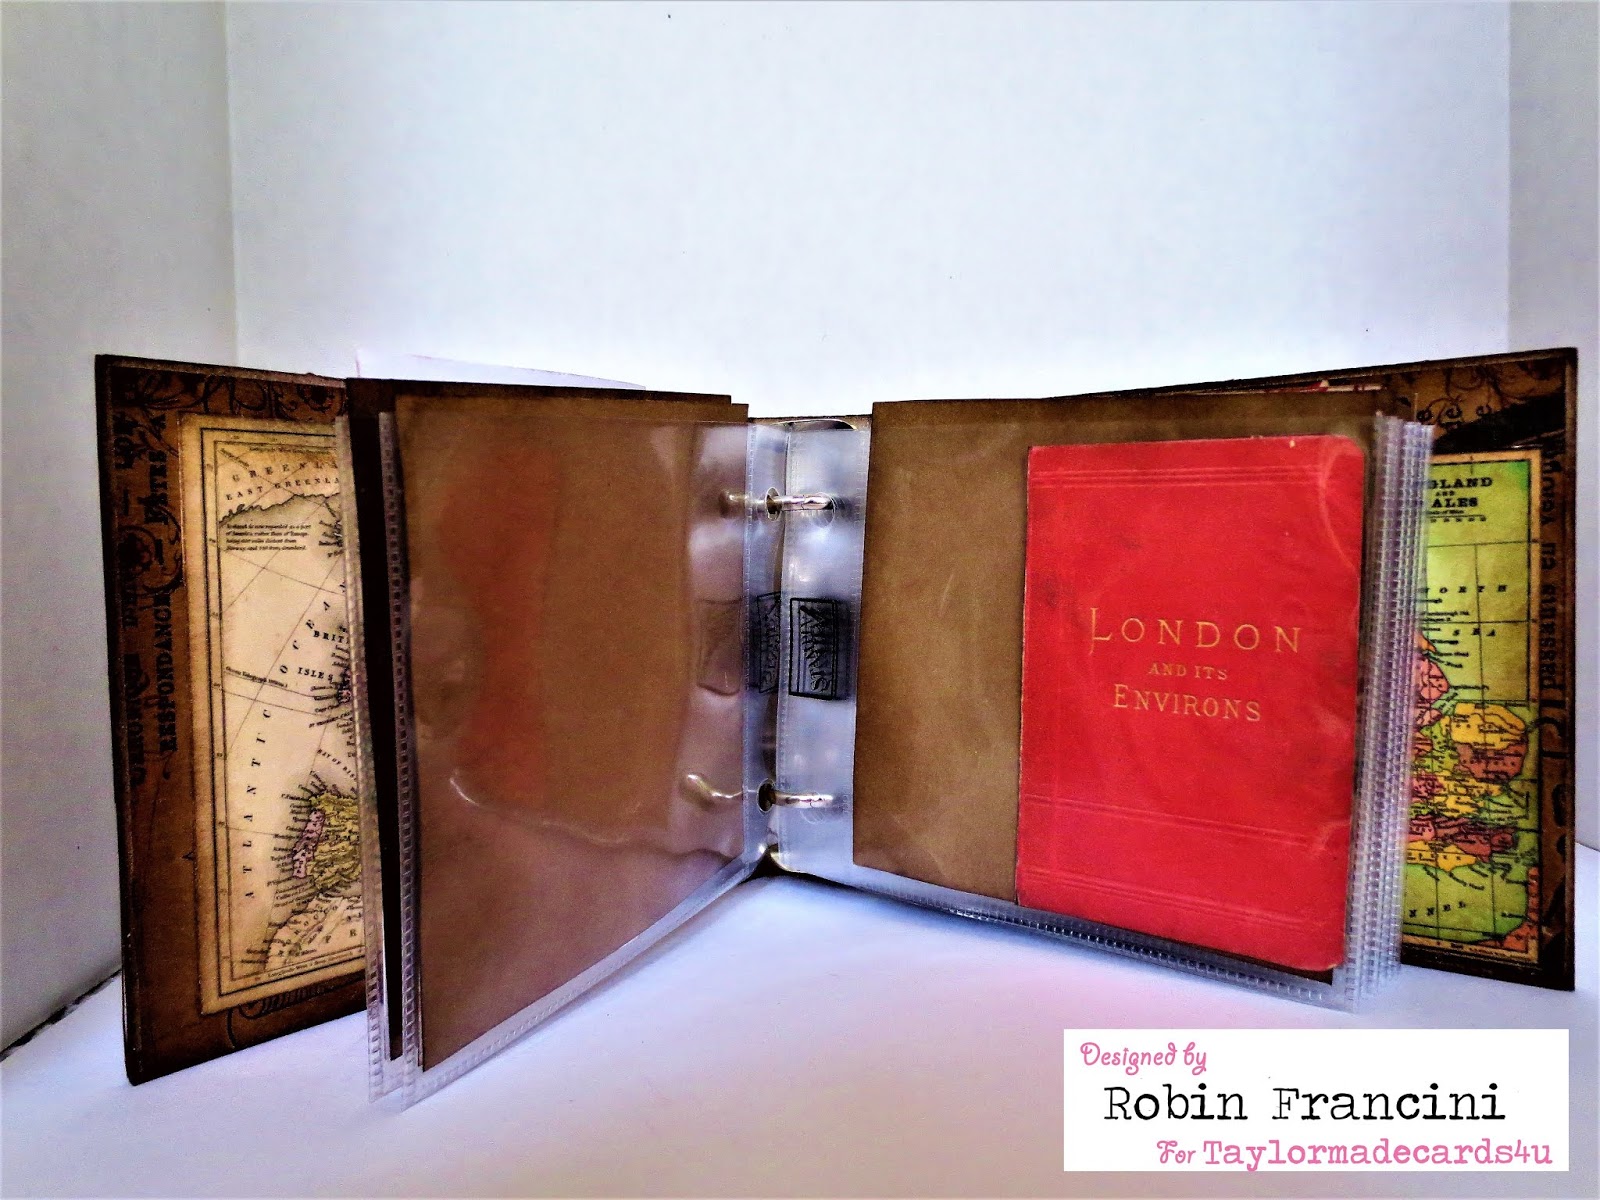
And here is my project!


I began by coloring my dragons, I used my favorite colored pencils, Reffine by Marco, and fussy cut them out. I then cut all the pieces needed for my box card out using the die cut set from Lawn Fawn.  I run the gray pieces of stock through my big shot inside of a embossing folder to get the brick look. I then punched a piece of green scrap for my grass. That just left the fun part,  putting it all together!

Thank You for visiting and as always, I appreciate your kind comments and continued support.

Until next time......

Robin


Friday, June 28, 2019

Creating With Infinity Engraving Steampunk Mermaid Junk Journal June 28 2019


June 28 2019

Welcome Back Friends,

Summer has arrived in Northeast Ohio, it is blistering hot and humid today, such a perfect day to be at the beach, soaking up the sun, water, and hoping for some relief!

I can remember vacations in Florida ,where my Mom's family is all settled. Lots of trip to the ocean and beach, sand in my hair and lots of sun, cool breezes and the taste of salt on my lips. Hunting for sea shells and always hoping for a glimpse of dolphins and maybe even a mermaid!!

My memories of the beach came in handy as I was creating my  Steampunk Mermaid Junk Journal, with the fantastic chip board steampunk mermaid from Infinity Engraving, which can be found here:
Creating with Infinity Engraving

Be sure to use coupon code: IE Summer for 10% off your purchase!


I used a cracker box for the base of junk journal, taking care when cutting off the top and bottom flaps and the right side panel.

I covered the front, spine and back, with pattern paper creating the cover for my journal. I then used some very pretty tissue paper I had saved, never throw anything away, but tearing the right edge of the tissue paper, taking care when you adhere it down, to remove any wrinkles. I then inked the edges using Tim Holtz Distress Ink- Walnut Stain. Set aside to dry.

I then went to work on my chip board steampunk mermaid by inking all the edges using Walnut Stain Ink. I applied the ink heavier as I got towards her waist and fin, to highlight all the intricate detail, taking care to ink her tail edges,

I used Tim Holtz  Cracked Pistachio Distress ink on the cogs and gear body jewelry and top tail detail. I also gave all the cogs and gears a good inking with the same ink.

Now the fun part, parting it  all together! I laid out my pieces and moved them around until I was happy with how the cover looked, then adhered them down with glue.

I used a simple binding method to bind my pages to the book cover, using a cog and cotton string.


As always, I appreciate your support and kind comments!


Until next time...........

Robin


Thursday, June 20, 2019

Scrapping4fun Challenge Blog # 143 Birthday June 21 2019

June 19 2019

Welcome Back Friends,

Happy Birthday to Scrapping4fun Challenge Blog! And to it's owner, Rachelle !! I love celebrating  birthdays, what better day  to celebrate then the day someone or something was born!

Be sure to check out Scrapping4fun # 143, Birthday Challenge  that can be found here; Scrapping4fun and please consider  joining us soon by submitting your work in one of our challenges.

Here is my project I created using the cutest image from : Odd Ball Art


I decided on a gift bag since our theme is birthday. I paper pieced my imagine together and then die cut my sentiment out and adhered all on the bag.


To paper piece a digi stamp, you need to run your pattern paper through your printer and print it for each  different pattern you have chose to use. Fussy cut your pieces out and adhere to the plain image.


As always I appreciate your kind comments and support. Thank You for visiting.

Until next time........

Robin


Thursday, June 6, 2019

Scrapping4fun Challenge Blog # 142 Summer June 7 2019

June 7 2019

Welcome Back Friends,

What a great time I had creating for Scrapping4fun Challenge Blog this month! Consider joining us in a challenge soon! Scrapping4fun Challenge Blog

All though it has been cool in North East Ohio, summer is hopefully on its way! Summer always brings lots of get together's, party's and sitting around the fire, with your favorite beverage.

I chose to work with this adorable digi stamp from Ericraft :  what a hoot this Llama is! Check em out here : Party Blower Llama !


I wasn't sure if I was working with a male Llama or a female Llama, LOL. I decided a female would be more fun, so check her out!


Get out there and throw a get together, sit around the fire and PARTY !!

Thanks you for visiting and as always I appreciate your kind comments and support

Until next time.........

Robin


Wednesday, June 5, 2019

Taylormadecards4u Passport To Summer Blog Hop June 5 2019


Welcome Back Friends,

So happy you have stopped by to visit the Taylormadecards4u Summer Blog  Hop!! Join me and my fellow design team members for a whirl win tour of  amazing inspiration, and projects,  as you hop along with us to Paris, New York, and London!

In celebration of our Passport to Summer Blog Hop, Monica is offering a promotion, of all 3 Passport Kits, Paris, New York and London, purchased as a set for $ 11.00! That is like purchasing 2 sets and getting one for free! You will also have a chance to win and to work with the beautiful set of images, from Passport to London,  just by leaving me a comment on my blog, by June 12.  And if that is not exciting enough, Monica is giving away a  $15.00 gift to the digital section of her shop!!  Winners will be posted on Monica's blog .  If you have not yet checked out her digital images, and her shop, be sure too!


Drum Roll, Please............ Passport to Paris: https://www.taylormadecards4u.com


       Next Up Passport to New York : https://www.taylormadecards4u.com/


And our last stop, Passport to London : https://www.taylormadecards4u.com


I have never been to London, however I fell in love with the idea of going, while working with the beautiful images in this kit.

 I decided to create a mini travel book with pockets for photo's, ticket stubs, memories and more and also a  book jacket to store it in.

                                        Here is the jacket I created to hold my mini book.


                                           Here is a look at front cover of my mini book


                                                       Front inside page of my mini book


                                                A peek at the inside of some of the pages.


And the last page 


I hope you enjoyed your tour with us!


Thank You for visiting. As always I  appreciate your kind comments. Don't forget to leave me a comment for a chance to win your own Passport to London Kit by June 12 2019!

Be sure to check out my fellow design team members blogs, for beautiful projects and a chance to win a prize!


Tuesday, June 4, 2019

Creating With Infinity Engraving Arrows Released May 27 2019


June 4 2019

Welcome Back Friends,

Have I got a grunge project for you today! I had the wonderful opportunity to work with the chip board arrows from Infinity Engraving, which can be found here: https://etsy.me/2DX5Cpt.

I started out by making a box card,adding pattern paper to all the panels. I  then cover the arrows in matching pattern paper. After the glue was dried, I added more grunge by stamping on the arrows using a couple different scribble stamps and black ink. I then added the arrows to the card and the sentiment "Watts Up" !

Infinity Engraving has a wonderful selection of chip board designs ready to be painted, papered, and stamped. Be sure to visit their Etsy shop:https://etsy.me/2DX5Cpt and use coupon code:
 Newie 5.


Thank You for visiting, I appreciate your kind comments and continued support

Until next time......

Robin

Sunday, June 2, 2019

Get Creative Challenge Blog DT Project, ATG-Twist Favorite Color Combo 6/2019


Welcome Back Friends

What a fun project this was create for Get Creative Challenge Blog! The theme for June is Any Thing Goes, with a Optional twist - Favorite Color Combo.  That would Black, White, and Pink for me today! I have a few favorite color combos, however this one is top on my list,

I worked with a wonderful digi image from Pattie's Creations. Thanks Pattie !


I started my project using a composition note book, perfect, black and white, I colored the chandelier, pink of course, and then added glitter glue to all the baubles, fussy cut the chandelier out, adhered it the front of the notebook, added some pink dotted ribbon, and added my sentiment.


 Quick and very cute gift !


Thanks for visiting, I appreciate your support and kind comments.

Until next time....

Robin


Gecko Galz November Challenges....Victorian Fantasy

 Hello, Join us over at  Gecko Galz Blog  and get your craft on with our theme for this month, Victorian Fantasy! Great prizes to be won, an...